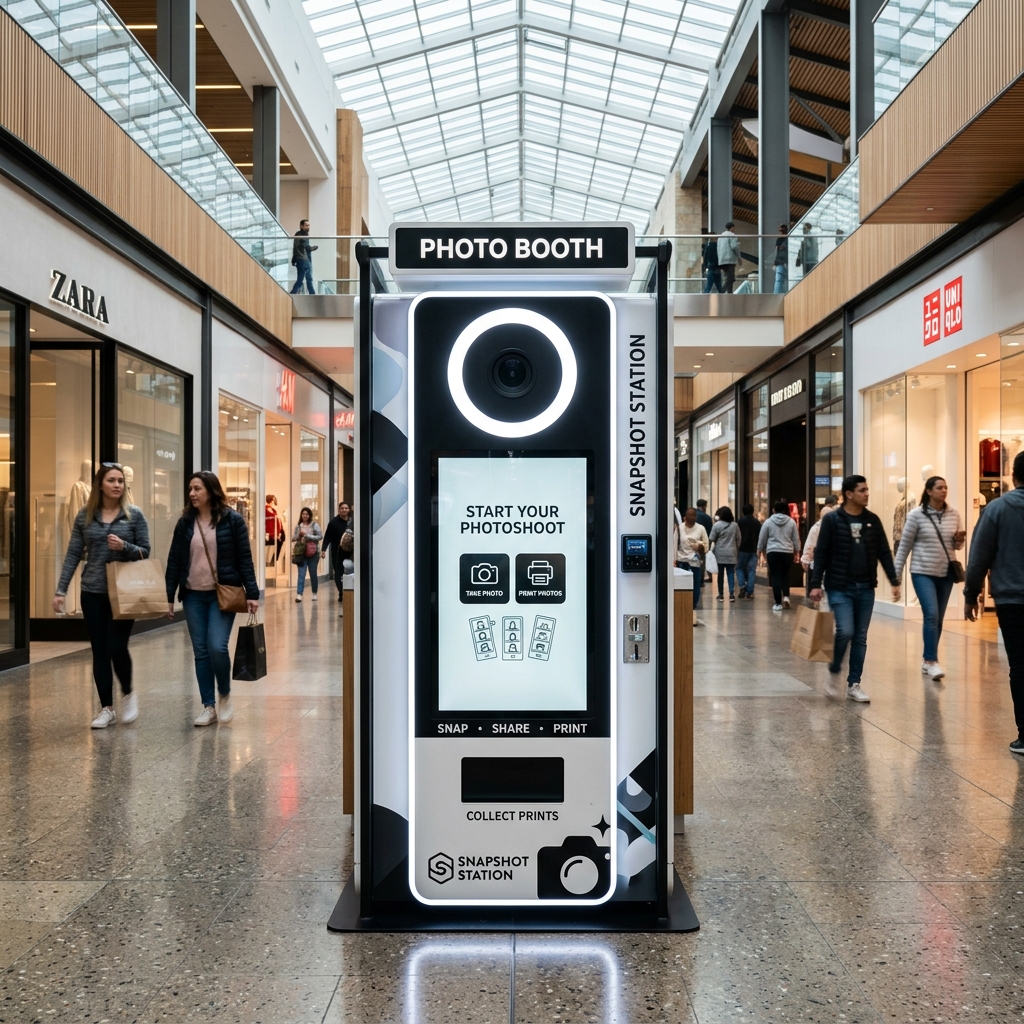
Building the Ultimate Mall Kiosk
If you have secured a spot in a shopping mall, the next step is building a machine that is reliable, secure, and visually attractive. Unlike event rental booths which are designed to be broken down, a mall kiosk needs to be a solid, permanent fixture that runs 24/7 without overheating.
1. The Enclosure Shell
For a permanent installation, powder-coated steel or aluminum is highly recommended over wood. Metal is secure against vandalism, handles heat dissipation better, and gives a sleek, premium finish.
Make sure your enclosure has a locking back door, and critically, ventilation fans. Dye-sublimation printers generate heat when running continuously, and trapping that heat in a metal box will lead to hardware failure.
2. The Brain: Windows Mini-PC
Skip the iPad. For an unattended kiosk, you want a dedicated Windows Mini-PC (like an Intel NUC). Windows allows for USB peripheral management, auto-boot on power loss, and running professional software like PICABOT. Mount the PC securely inside the cabinet and wire it to a 15-inch or 21-inch industrial capacitive touchscreen.
3. The Camera: Choose a 4K Webcam
Because your kiosk will be running 12 to 24 hours a day, you should not use a DSLR. DSLR sensors will overheat and shut down if left in live-view continuously. Instead, mount a high-end 4K Webcam (like the Logitech Brio) inside the cabinet.
Webcams do not overheat, and software like PICABOT can automatically turn the webcam off when the mall is empty, waking it up instantly when someone taps the screen. Because webcams have smaller sensors, you must compensate with excellent, continuous LED ring lighting built into the faceplate of your kiosk.
4. The Printer
Use a Dye-Sublimation Printer (like the DNP RX1HS). Dye-sub printers print a completely dry, water-resistant 4x6 photo in about 12 seconds. They hold rolls of 700 prints, meaning you can leave the machine unattended for weeks.
5. Putting it Together with Software
Install PICABOT on the Mini-PC. Connect the webcam and printer, and set PICABOT to full-screen Kiosk Mode. PICABOT will handle the live view, overlay your custom mall branding, collect the Razorpay/UPI payment via the touchscreen, and send the final image to the printer automatically.